How to Download Skool Videos on Windows (Free, No Extra Software)
Step-by-step guide to downloading Skool course videos on Windows as MP4 files — Skool native, Loom, Vimeo, YouTube, and Wistia. No helper app, no terminal, no SmartScreen prompts.
Downloading Skool videos on Windows is unusually simple, mostly because of what you don't have to do: there's no separate helper app to install, so there's no Windows Defender SmartScreen dialog to click past, no admin permissions to grant, nothing to approve outside the browser. The extension converts video streams into MP4 entirely inside the browser tab.
This guide covers installation, your first download, queueing multiple downloads, and the Windows-specific issues that do occasionally come up.
What you need
- Windows 10 or Windows 11
- Chrome, Edge, Brave, or Opera (Firefox and Safari aren't supported)
- A Skool account with access to the community you want to download from
The general guide to downloading Skool course videos covers the same workflow platform-agnostically, and there's a Mac version of this guide if you use both.
Step-by-step: downloading on Windows
Step 1 — Install the extension
Add Skool Video Downloader from the Chrome Web Store. Pin it to your toolbar by clicking the puzzle-piece icon in Chrome or Edge and clicking the pin next to it. No account, license activation, or extra installer is required to get your 5 free downloads a week.
Step 2 — Open the lesson and press play
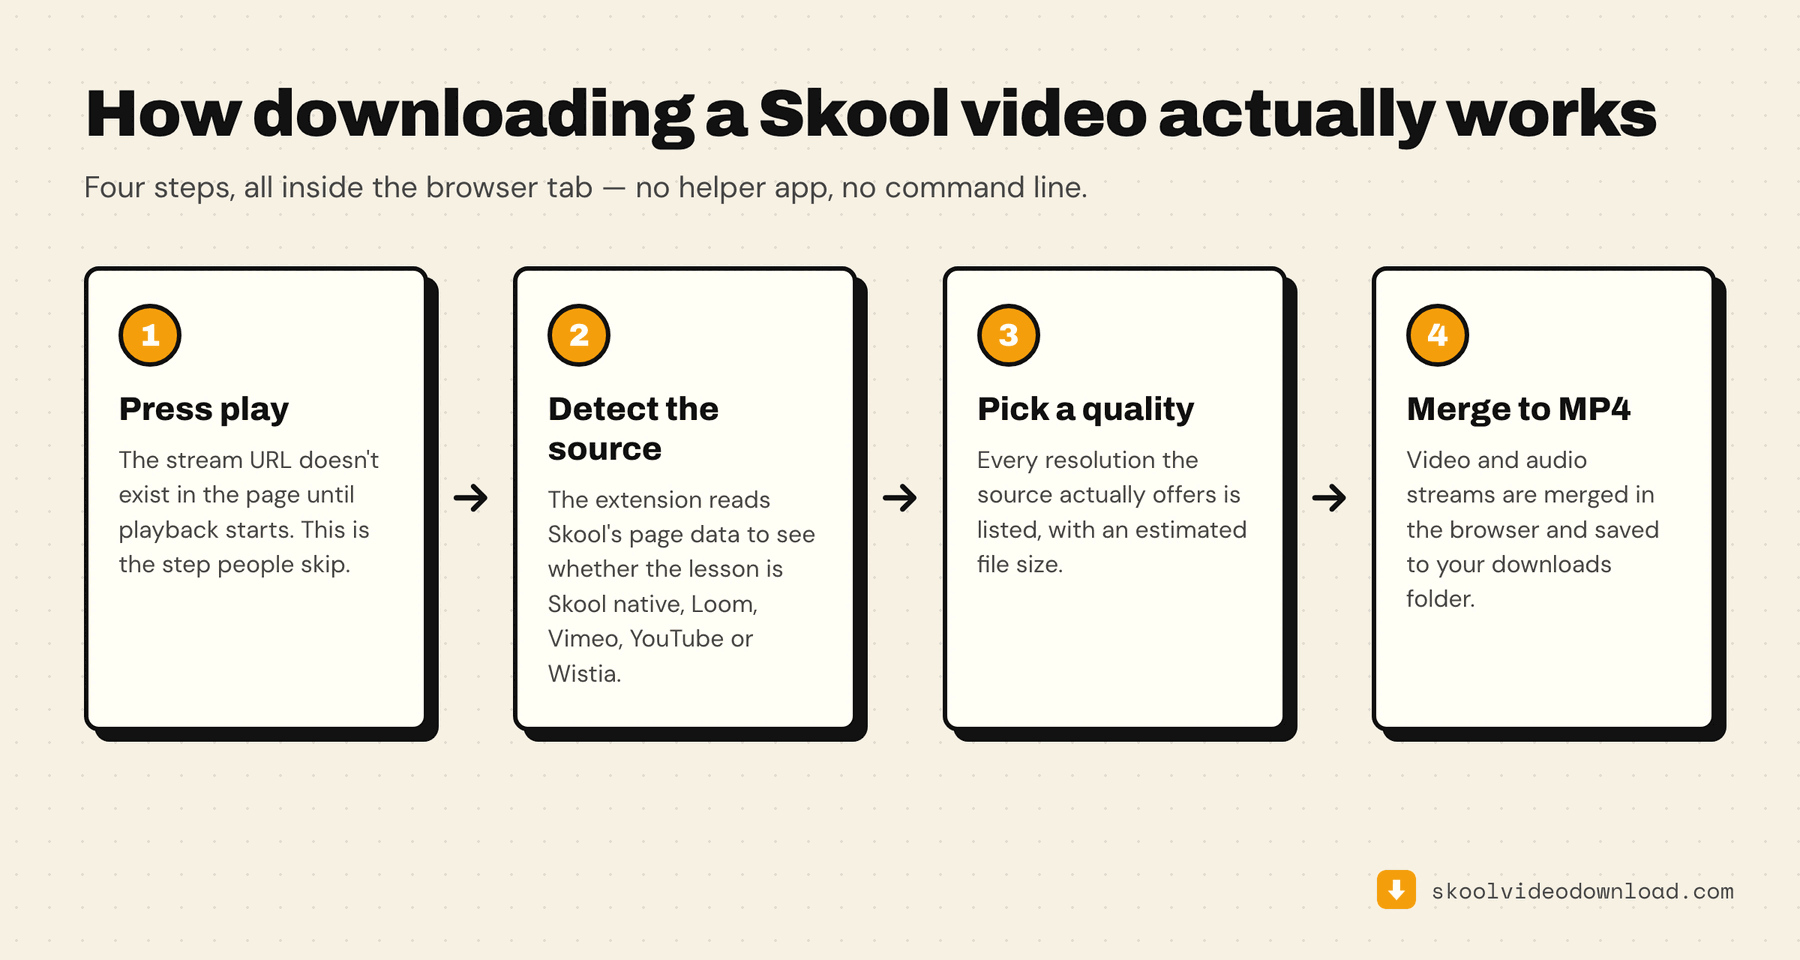
Navigate to the Skool classroom, community post, or course module with the video. Press play before opening the extension — the video data (regardless of whether it's Skool's native player, Loom, Vimeo, YouTube, or Wistia) is only loaded into the page once playback starts.
Step 3 — Scan and pick a quality
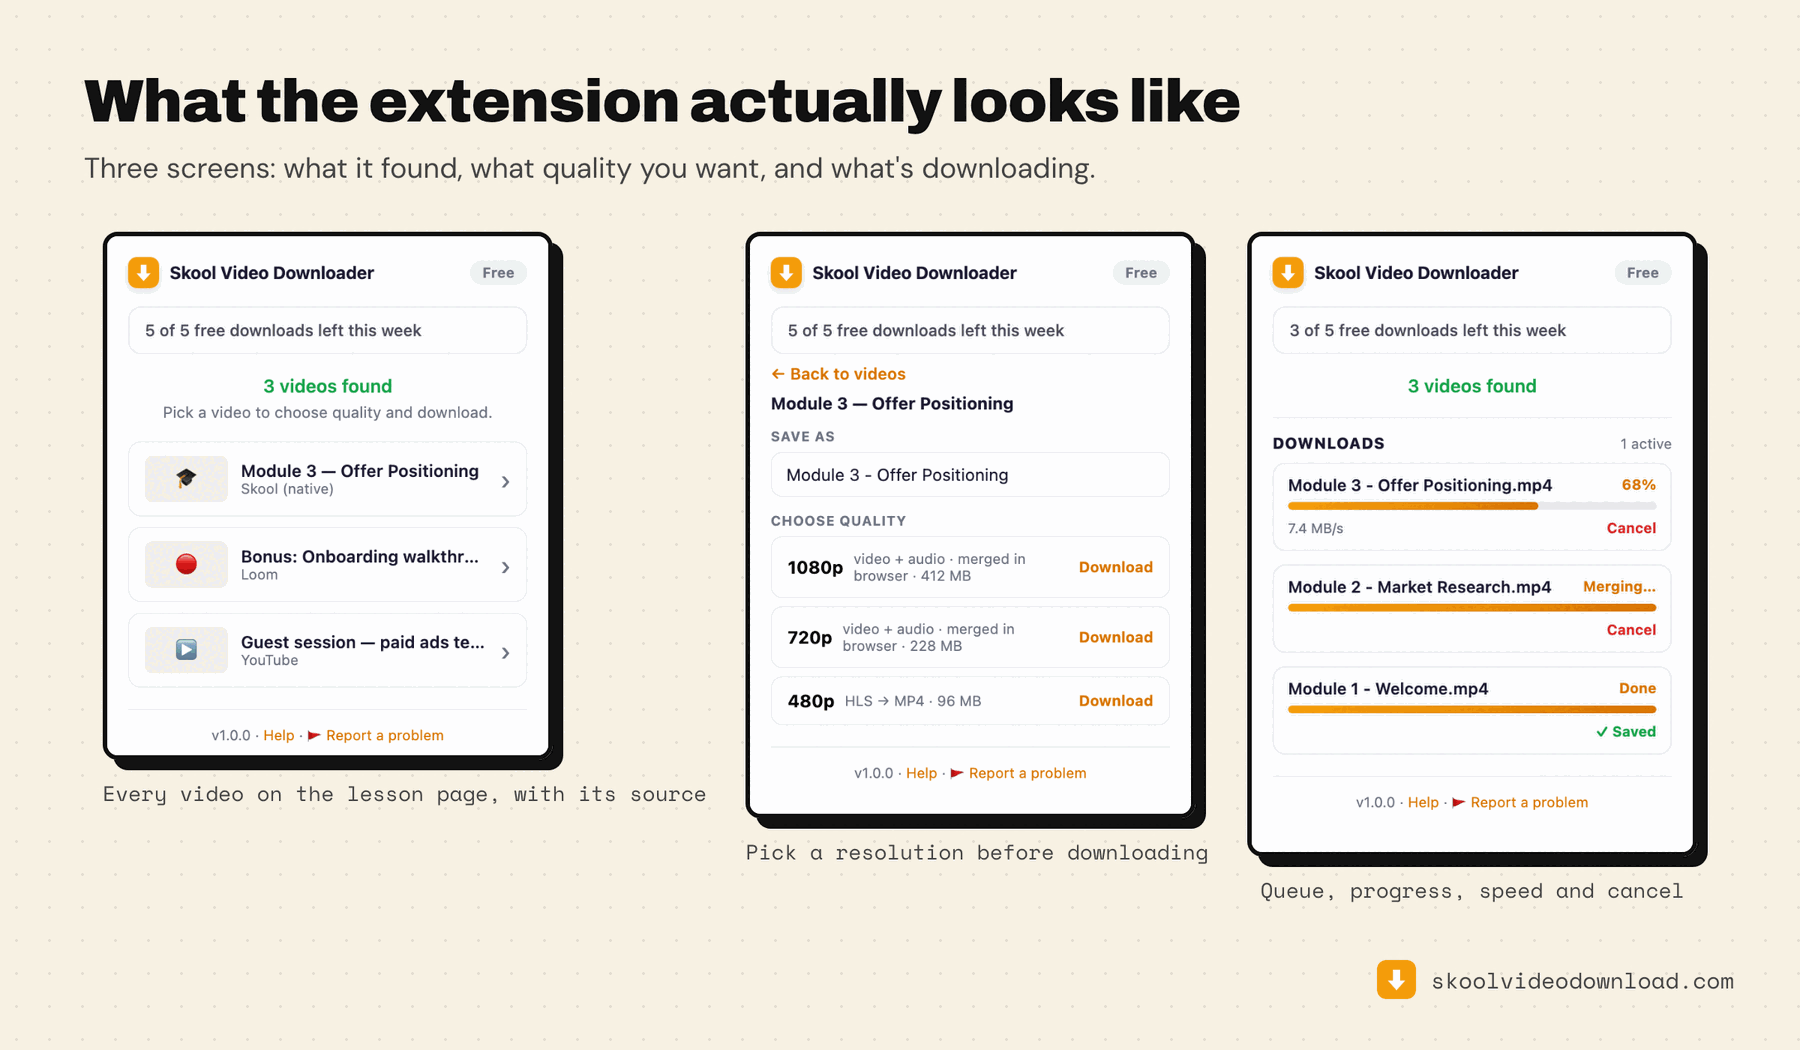
Click the extension icon in your Windows toolbar. It automatically figures out which platform is serving the video and shows every resolution available for that specific lesson.
Step 4 — Download
Pick your quality and click Download. Everything — including converting adaptive HLS streams into a standard MP4 — happens right in the browser. There's no separate process running in the background, so there's nothing for Windows Defender to flag.
Step 5 — Find your file
The MP4 saves straight to your Windows Downloads folder, named after the lesson title.
Queueing several downloads on Windows
You can queue as many downloads as you like and they run one after another. Open a second (or third) Skool lesson in a new tab, press play, and add it to the queue while the first is still converting. The download manager panel shows a live progress bar, speed, and a cancel button for each one — no need to babysit a single download at a time.
Common Windows-specific issues
"The extension icon isn't showing in my toolbar." Click the puzzle-piece (Extensions) icon next to the Chrome or Edge address bar, find Skool Video Downloader in the list, and click the pin icon.
"No video detected." You almost certainly opened the extension before pressing play. Go back to the lesson, press play, wait a couple of seconds, then reopen the extension.
"The download finished but I can't find the file." Check C:\Users\YourName\Downloads directly in File Explorer rather than the Downloads shortcut — some Windows setups redirect Downloads to a OneDrive-synced folder, and OneDrive can leave files as cloud-only placeholders until you open them.
"Only 360p or 480p shows up as an option." That's the actual resolution the creator uploaded for that lesson, not a limitation of the extension — Skool's player doesn't upscale beyond what was uploaded.
"It worked on one lesson but not the next." Different lessons in the same course can use different video platforms (Skool native for one, a Loom recording for another). The extension detects each independently — press play and rescan on the new lesson.